

 English
 русский
 España
 Portugal
 عربي
عربيMost first-time fish tank setups fail within the first month, and the cause is almost never the fish itself. It is the water. A fish tank setup is not about filling a glass box and adding fish on day one; it is a controlled sequence of equipment choices, biological preparation, and water management that lets the aquarium support life for years. When the sequence is right, the tank stabilizes quickly and stays clear. When it is rushed, ammonia rises, algae blooms, and the fish pay the price. This guide lays out the order of operations that experienced hobbyists actually follow, so you can build a tank that looks good and stays healthy from the start.
Content
- What a Fish Tank Setup Actually Requires
- Step 1: Choose the Right Tank Size and Material
- Step 2: Install a Filter That Can Handle the Bioload
- Step 3: Add Aeration and Gentle Water Movement
- Step 4: Set Up Lighting, Heating, and Substrate
- Step 5: Cycle the Tank Before Adding Any Fish
- Common Fish Tank Setup Mistakes to Avoid
- Fish Tank Setup FAQ
- The Bottom Line
What a Fish Tank Setup Actually Requires
Every healthy aquarium depends on six building blocks, and the smartest approach is to plan all of them before buying a single item: the tank itself, a filter that handles both mechanical and biological work, water movement and aeration, lighting matched to the inhabitants, temperature control, and a substrate that anchors the nitrogen cycle. Choose these six correctly and the rest of the setup is mostly assembly and patience.
| Component | Primary Job | Beginner Sizing Rule |
|---|---|---|
| Tank | Holds water and fish | Start with 20 gallons if space allows |
| Filter | Removes waste, hosts beneficial bacteria | Flow rate at least 4x tank volume per hour |
| Air pump or circulation pump | Adds dissolved oxygen, prevents dead spots | Match airflow to tank volume and stocking level |
| Heater | Keeps temperature stable | 3 to 5 watts per gallon |
| Light | Supports plant growth and fish rhythm | Run 8 to 10 hours per day on a timer |
| Substrate and hardscape | Hosts bacteria, provides shelter | 1 to 2 inches of gravel or sand |
Step 1: Choose the Right Tank Size and Material
The bigger the tank, the easier it is to keep stable, so the most important equipment decision is size. A 20-gallon tank can absorb a feeding mistake or a heater failure that would destroy a 5-gallon tank within hours, because a larger water volume dilutes waste and resists sudden temperature changes. Beginners who skip the starter size and buy a tank they can grow into almost always report fewer problems.
Glass remains the default because it resists scratching and costs less, while acrylic is lighter and stronger but scratches more easily. Cabinets and floor load also matter once you go above 55 gallons, so measure the space and check the rated weight before committing. If space is limited, a compact desktop tank can still work well when equipment is matched to its smaller volume. The compact AT series view aquarium is one example of a small tank designed to keep the setup clean and the viewing experience clear, which reduces the number of separate purchases a beginner has to coordinate.
 Custom AT Series View Aquarium Suppliers, ODM Factory - Sensen Group Co., LtdSensen Group Co., Ltd is China custom AT Series View Aquarium Suppliers and ODM AT Series View Aquarium Factory,details:One-touch / eight...View Product →
Step 2: Install a Filter That Can Handle the Bioload
The filter is the most important piece of equipment in any fish tank setup because it does two jobs at once: it removes solid waste mechanically, and it houses the beneficial bacteria that convert toxic ammonia into less harmful nitrite and then nitrate. An undersized filter is the most common hidden cause of cloudy water, sick fish, and algae problems in new tanks, so choose a model rated for a larger tank than the one you actually own.
The main forms of aquarium filtration are usually combined in one device, and each type has distinct trade-offs:
For tanks in the 10 to 40 gallon range, the HBL series hang-on filter provides steady turnover, easy cartridge access, and quiet operation, which covers the two things beginners need most: reliability and simple maintenance.
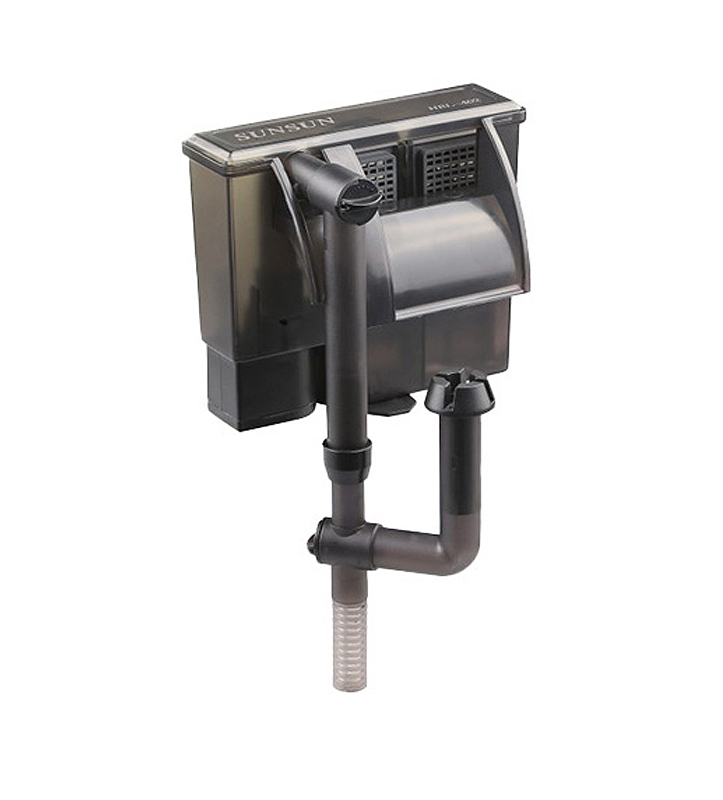 Custom HBL Series Hang On Filter Suppliers, ODM Factory - Sensen Group Co., LtdSensen Group Co., Ltd is China custom HBL Series Hang On Filter Suppliers and ODM HBL Series Hang On Filter Factory,details:Model Voltage...View Product →
Step 3: Add Aeration and Gentle Water Movement
An air pump is not as optional as many beginners assume. Even when the filter disturbs the water surface, an air pump increases dissolved oxygen, improves circulation, and helps the water release carbon dioxide. During hot weather, after medication, or when the tank is slightly overstocked, that extra oxygen is often the difference between healthy fish and fish gasping at the surface.
The key is matching the pump to the tank. A good starting point is matching an air pump to your tank volume and stocking level rather than buying the cheapest model on the shelf; an oversized pump creates unnecessary turbulence and noise, while an undersized one fails exactly when you need it most. Magnetic vibration designs, such as the CAP series magnetic vibration air pump, run quieter and last longer than basic piston models, which makes them a practical upgrade for a living room or bedroom setup.
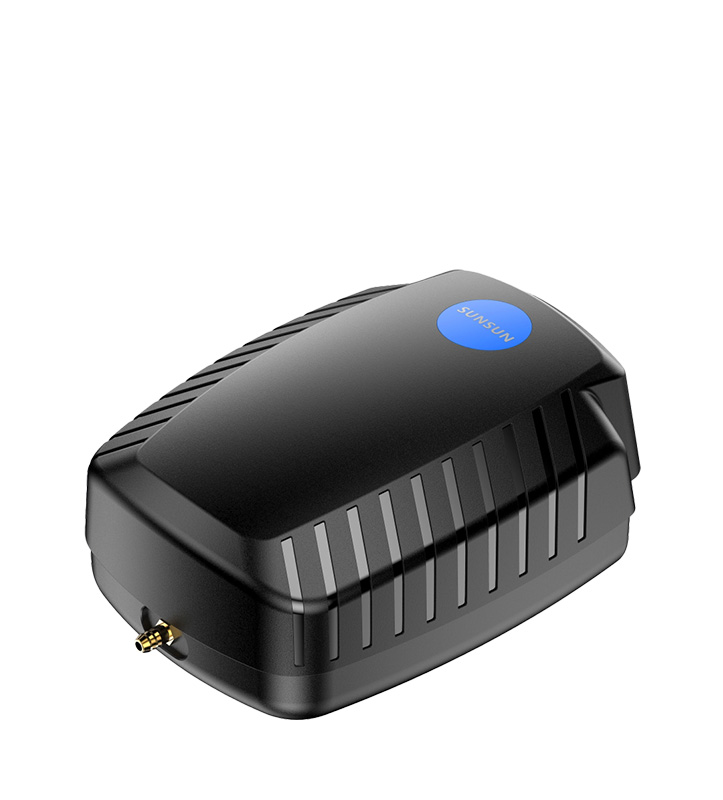 Custom CAP Series Magnetic Vibration Air Pump Suppliers, ODM Factory - Sensen GrSensen Group Co., Ltd is China custom CAP Series Magnetic Vibration Air Pump Suppliers and ODM CAP Series Magnetic Vibration Air Pump Fac...View Product →
Step 4: Set Up Lighting, Heating, and Substrate
Lighting
Lighting is about the needs of the tank, not the room. Planted tanks need more intense light than fish-only tanks, and too much light without enough plants leads directly to algae. A timer that turns the light off after 8 to 10 hours prevents the most common lighting mistake: forgetting to switch it off at night.
Heating
Most tropical fish need a stable temperature between 74°F and 80°F, and stability matters more than the exact number. Position the heater near the filter outlet so water flows past it constantly, and always check the temperature with a separate thermometer rather than trusting the heater dial. A difference of a few degrees over a single day stresses fish far more than a steady temperature that sits slightly outside the ideal range.
Substrate
Substrate is not just decoration; it hosts a large part of the bacteria colony and gives fish a sense of security. A layer of 1 to 2 inches of gravel or sand is enough for most tanks, and the substrate should be rinsed thoroughly before it goes in to avoid turning the water cloudy. Darker substrates also help fish feel calmer and make their colors stand out more clearly.
Step 5: Cycle the Tank Before Adding Any Fish
Cycling is the step most beginners skip, and it is the step that decides whether the tank succeeds. Cycling means growing the colony of beneficial bacteria that converts ammonia into nitrite and then into nitrate. Without that colony, the first fish food produces ammonia, ammonia spikes, and the fish suffer permanent damage or die within days.
The fishless cycling process takes four to six weeks and follows a simple sequence:
- Set up the tank, fill it with dechlorinated water, and run the filter and heater.
- Add a small ammonia source to simulate fish waste.
- Test ammonia, nitrite, and pH every two to three days.
- Wait until ammonia and nitrite both read zero and nitrate appears.
- Add fish gradually, a few at a time, and keep feeding light for the first week.
During cycling, resist the urge to do large water changes; they only slow down the bacteria growth. For smaller systems where the margin for error is tighter, the water quality management routine for small fish tanks explains how to adapt the same principles to a compact volume.
Common Fish Tank Setup Mistakes to Avoid
Even experienced keepers lose tanks occasionally, and most losses trace back to a handful of repeatable errors that are easy to prevent:
- Adding fish before the tank is cycled, which poisons the water before bacteria can catch up.
- Overstocking, because fish produce waste faster than the filter can process it.
- Overfeeding, which adds ammonia and feeds algae at the same time.
- Washing filter media under tap water, which kills the bacteria colony and restarts the cycle.
- Skipping weekly water changes, which allows nitrate and phosphate to climb slowly until the tank turns green or the fish weaken.
Each of these mistakes is avoidable once you know it exists, and preventing them costs nothing more than patience and a weekly routine.
Fish Tank Setup FAQ
How long does a complete fish tank setup take before adding fish?
A fishless cycle normally takes four to six weeks. If you use mature filter media from an established tank, it can be shortened to one to two weeks, but water testing should always confirm the cycle is complete before any fish are introduced.
How many fish can a new tank hold?
The old rule of one inch of adult fish per gallon is only a rough starting point. A more reliable approach is to keep the total fish mass low for the first two months, then gradually add stock while watching ammonia and nitrite readings. Adding three small fish at a time is far safer than filling the tank all at once.
Do I need an air pump if my filter already creates surface movement?
A filter alone is often enough for lightly stocked tanks, but an air pump remains valuable as a backup for heat waves, medication periods, or overfeeding incidents. In planted tanks, moderate surface agitation also helps exchange carbon dioxide, which most fast-growing plants consume quickly.
Can I use tap water directly in the aquarium?
Yes, as long as you use a water conditioner to remove chlorine and chloramine first. Tap water should also be tested for ammonia and nitrate, because some municipal supplies already contain measurable amounts of both.
How often should I clean the tank after it is established?
Replace 15 to 25 percent of the water weekly, clean the glass and decorations as needed, and rinse filter media in old tank water every two to four weeks. Never clean the entire tank at once; the bacteria colony needs those surfaces to stay in place.
The Bottom Line
A successful fish tank setup is a system, not a purchase. Choose a tank size you can maintain, build the equipment package around filtration and aeration before decoration, cycle the water completely, and then let stocking happen slowly. If you follow that order, the tank will look good less by luck and more by design, and your fish will be healthier from the very first week.

 No. 61-79, Baima Street, Maao Town, Dinghai District, Zhoushan City, Zhejiang Province, China.
 0086 580 8082088 / 8081168
 0086 580 8080978
 songhua@sunsun-china.com